
Ash trays are no longer just basic smoking accessories—they’ve evolved into stylish decor pieces that reflect personality, creativity, and craftsmanship. With the growing popularity of DIY crafts, air-dry clay and polymer clay have become go-to materials for creating unique, handmade ash trays that combine both function and artistic expression. Whether you’re crafting for personal use, gifting, or even starting a small handmade business, clay ash trays offer endless possibilities in design, texture, and color.
In today’s Pinterest-driven world, aesthetic value matters just as much as functionality. People are no longer satisfied with plain, store-bought ash trays; instead, they seek customized, eye-catching pieces that complement their home decor or vibe. From minimalist neutral tones to bold statement designs, clay ash trays can be tailored to match any style—modern, boho, retro, or even luxury-inspired.
This blog post explores 10 creative ash tray clay ideas, each designed in a Pinterest-style format to inspire your next DIY project. Every idea is explained in detail so you can easily recreate it at home, even if you’re a beginner. You’ll learn how to shape, design, and finish each piece while understanding what materials work best for durability and visual appeal.
Additionally, we’ll cover the essential materials you’ll need and provide a step-by-step guide on how to make clay ash trays from scratch. By the end of this article, you’ll have not only inspiration but also the confidence and practical knowledge to craft stunning ash trays that stand out.
Let’s dive into the materials first and then explore these beautiful, handmade creations.
Materials Needed
Before you begin creating your clay ash trays, it’s important to gather the right materials. Choosing quality tools and clay will make a big difference in both the crafting process and the final result.
The most commonly used material is air-dry clay, which is beginner-friendly and doesn’t require baking. It dries naturally within 24–48 hours. Alternatively, polymer clay can be used if you prefer a more durable, heat-resistant finish, though it requires oven baking.
You’ll need a rolling pin or smooth bottle to flatten the clay evenly. A clay knife or cutter helps in shaping clean edges, while sandpaper is essential for smoothing out rough surfaces after drying. To create indentations for cigarettes, small tools like a spoon, sculpting tools, or even a pencil can be used.
For decorating, keep acrylic paints in your favorite colors, along with fine brushes for detailed work. If you want a glossy or waterproof finish, use a sealant or varnish—preferably heat-resistant for practical use. Metallic paints, gold leaf, or texture stamps can add an extra premium feel.
A non-stick working surface like wax paper or a silicone mat will prevent the clay from sticking while you work. You may also want molds or circular cutters if you’re aiming for perfectly shaped ash trays.
Optional additions include resin for a glass-like finish, marbling tools for mixing colors, and stencils for patterns.
Having all your materials ready before starting will streamline your process and allow you to focus on creativity. Now that you’re fully equipped, let’s move on to the step-by-step process of making a clay ash tray.
How to Make a Clay Ash Tray
Creating a clay ash tray is simpler than it looks, especially when you break it down into clear steps. Start by kneading your clay thoroughly. This step is crucial because it removes air bubbles and makes the clay easier to shape.
Next, roll out the clay to about 1–1.5 cm thickness. This ensures your ash tray is sturdy and doesn’t crack easily. Using a round object or mold, cut out your base shape. You can stick to a classic circle or experiment with abstract forms.
Once the base is ready, gently press the edges upward to form a shallow bowl shape. Smooth out any cracks or uneven areas using your fingers or a damp sponge. Now, create 2–4 small grooves along the rim where cigarettes can rest. These should be evenly spaced and deep enough to hold securely.
Let the clay dry completely if you’re using air-dry clay. This usually takes one to two days. After drying, use sandpaper to smooth the surface and edges.
Now comes the fun part—decorating. Paint your ash tray with acrylic colors, experiment with patterns, or add textures. Once the paint dries, apply a sealant or varnish to protect your design and make it long-lasting.
If you’re using polymer clay, bake it according to the instructions before decorating.
With the basics covered, let’s explore 10 unique and stylish ash tray ideas you can create.
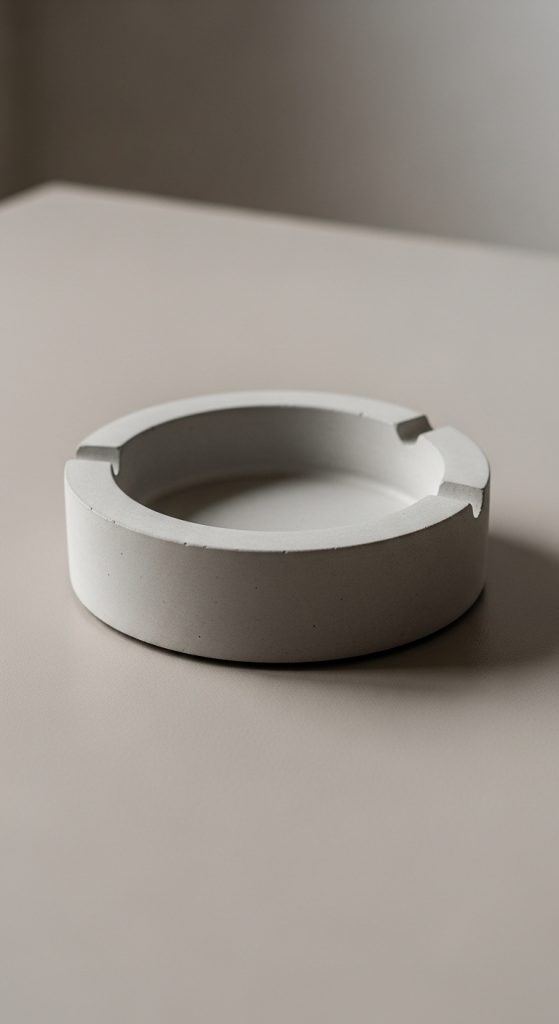
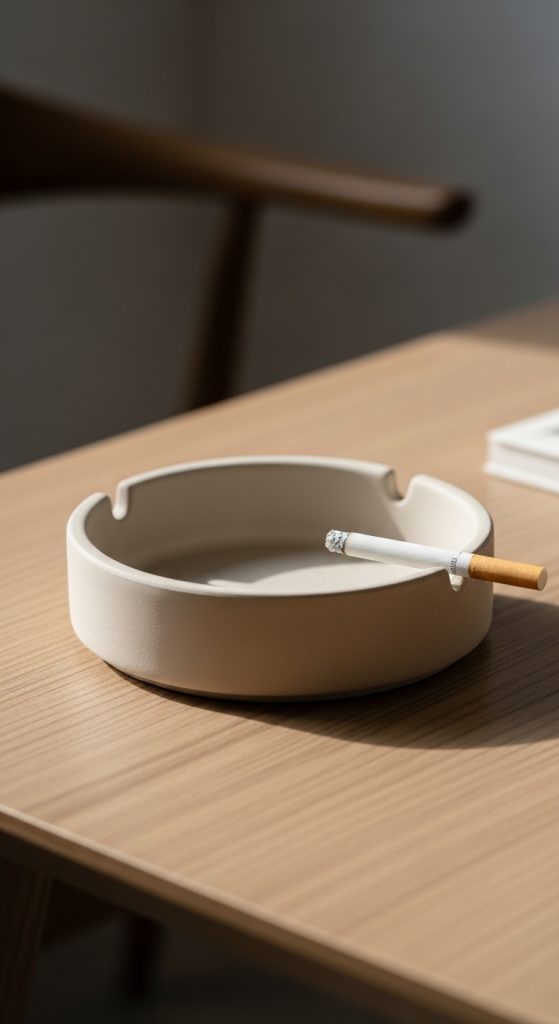
1. Minimalist Neutral Ash Tray
This design is perfect for those who love clean, modern aesthetics. A minimalist ash tray focuses on simplicity, neutral tones, and smooth finishes.
Start by shaping a perfectly round or oval tray with soft edges. Keep the design sleek without adding too many grooves—just two subtle rests for functionality. Once dried, paint the tray in neutral shades like beige, white, taupe, or soft grey.
To elevate the look, consider adding a matte finish sealant. Matte textures give a premium, ceramic-like appearance that blends beautifully with modern interiors. You can also incorporate subtle details like a thin gold rim or a single line pattern for elegance.
This type of ash tray works well in contemporary homes, offices, or as a gift. Its understated beauty makes it versatile and timeless.
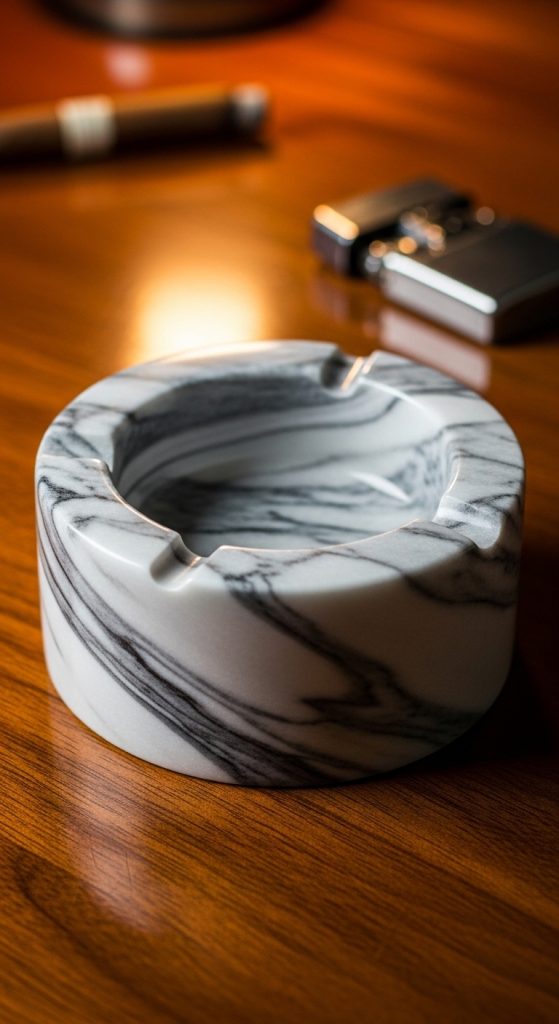
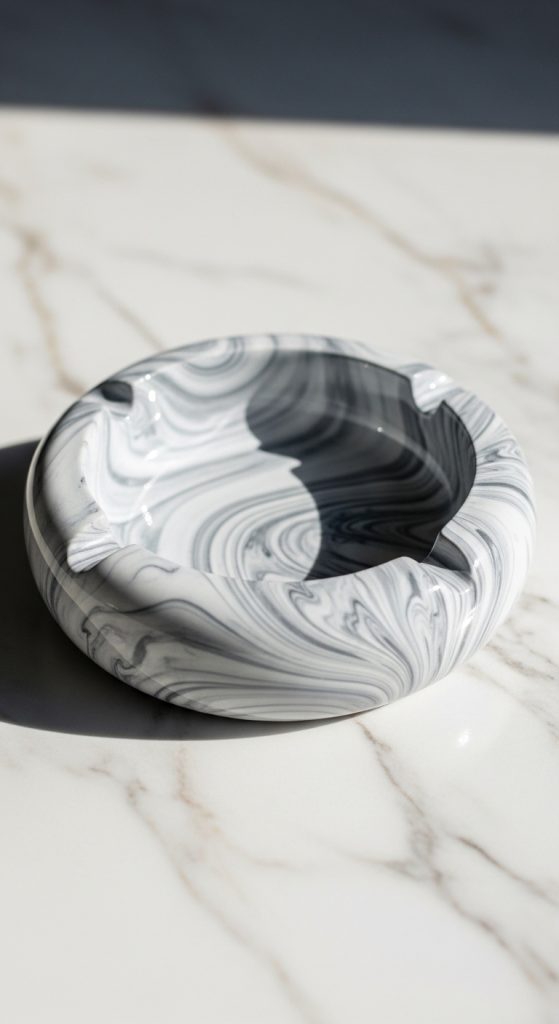
2. Marble Effect Ash Tray
Marble designs are extremely popular on Pinterest due to their luxurious and artistic appeal. This ash tray mimics the look of real marble using clay.
To achieve this effect, mix two or more clay colors—commonly white with black or grey. Gently twist and fold the colors together without overmixing to maintain the marbled pattern.
Shape your tray as usual, ensuring the patterns remain visible on the surface. After drying or baking, lightly sand the surface and apply a glossy sealant to enhance the marble effect.
The result is a sophisticated ash tray that looks expensive and unique. Each piece will have a different pattern, making it one-of-a-kind.
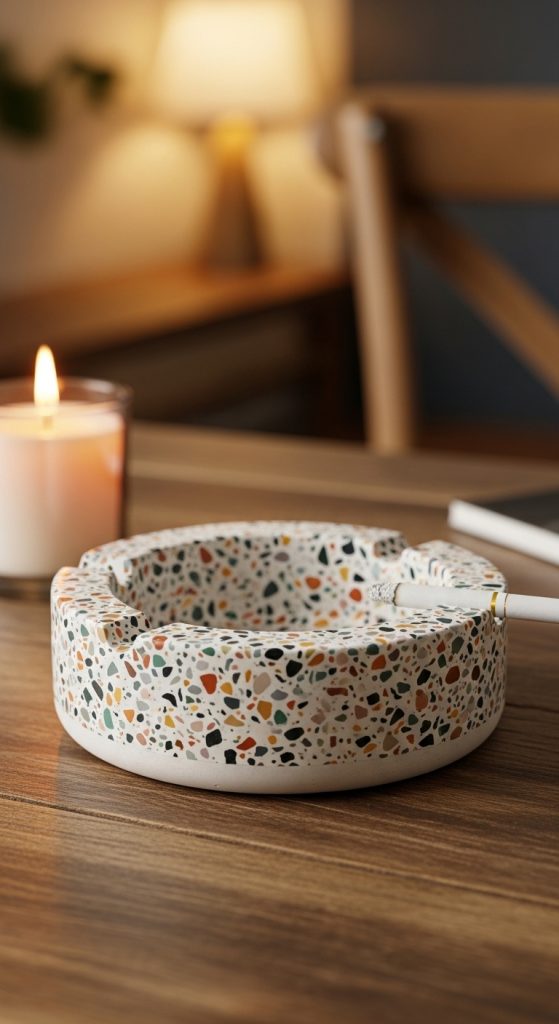
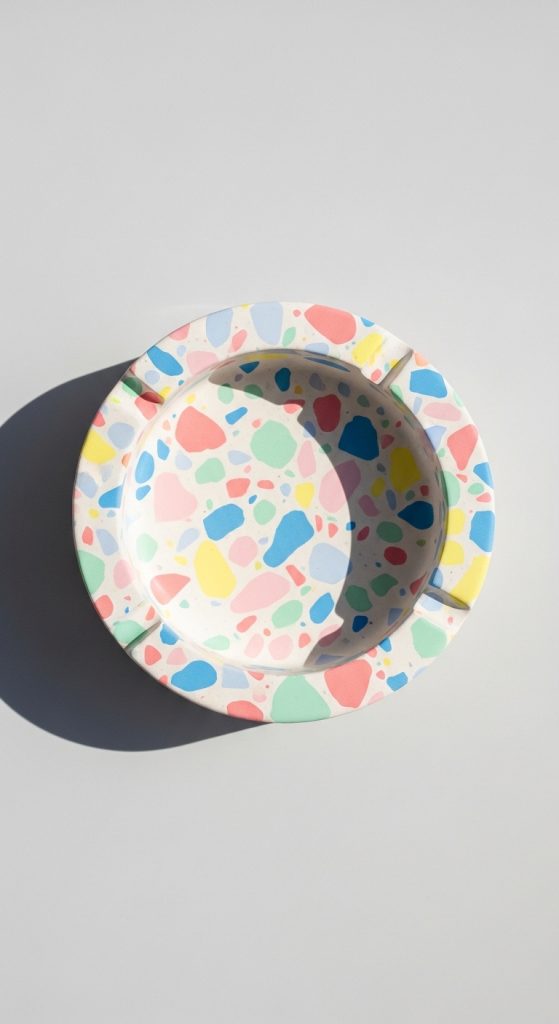
3. Terrazzo Style Ash Tray
Terrazzo designs are vibrant and playful, featuring colorful chips embedded in a neutral base. This style is ideal if you enjoy bold, creative projects.
Start with a light-colored base clay. Then, create small pieces of colored clay in various shapes. Mix these pieces into the base and roll it out gently.
Once shaped into an ash tray, the colorful bits will appear like confetti throughout the surface. After drying, sand it slightly to reveal more color and apply a sealant.
This design is perfect for adding a fun and modern touch to your space.
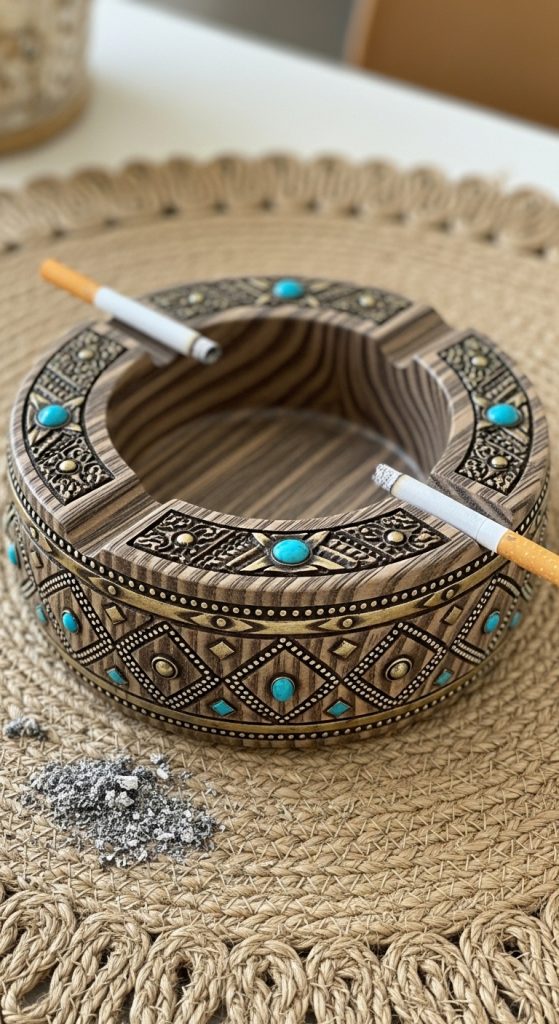
4. Boho Textured Ash Tray
Bohemian-style ash trays focus on texture and earthy tones. This design is great for creating a relaxed, artistic vibe.
Shape your tray and use tools to add patterns like lines, dots, or tribal motifs. You can even press fabric or leaves onto the clay to create natural textures.
Paint it using earthy shades like terracotta, brown, mustard, or olive green. A matte or slightly rough finish enhances the boho aesthetic.
This ash tray pairs beautifully with plants and natural decor.
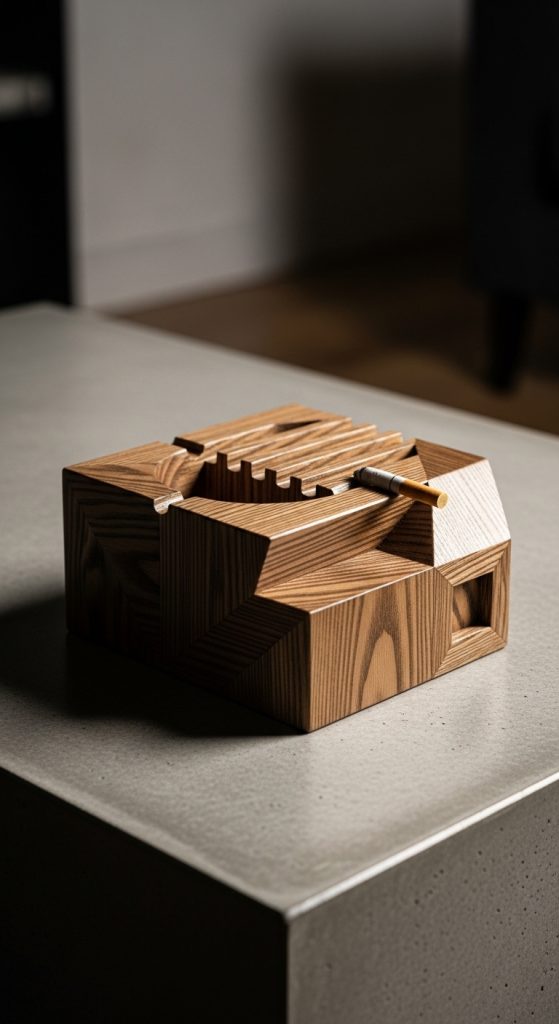
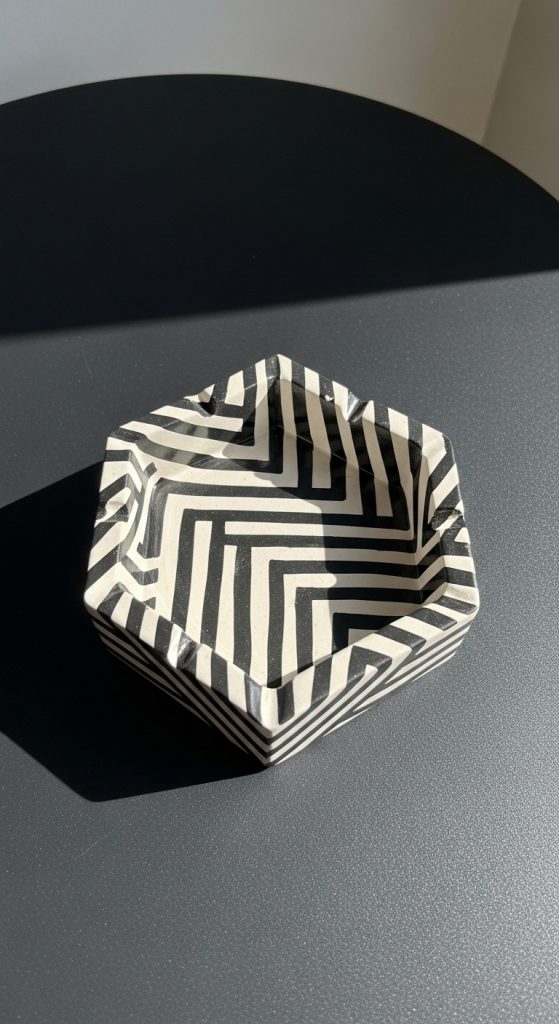
5. Geometric Modern Ash Tray
Geometric designs are bold and eye-catching. Instead of a traditional round shape, experiment with hexagons, triangles, or asymmetrical forms.
Use sharp tools to create clean edges and defined angles. Paint each section in contrasting colors or keep it monochrome for a sleek look.
This design is perfect for modern interiors and adds a statement piece to your space.
6. Leaf-Shaped Nature Ash Tray
Nature-inspired designs are calming and visually appealing. A leaf-shaped ash tray brings a natural touch to your decor.
Flatten your clay and carve out a leaf shape. Use a tool to draw veins and texture. Slightly curve the edges to create depth.
Paint it in shades of green or go for metallic tones like gold for a decorative piece. This ash tray is both functional and artistic.
7. Galaxy Theme Ash Tray
For something bold and creative, a galaxy-themed ash tray is a stunning option. It features deep colors and cosmic patterns.
Paint your tray black or dark blue as a base. Add swirls of purple, pink, and white to create a galaxy effect. Finish with tiny white dots to mimic stars.
Seal it with a glossy finish to enhance the depth and shine.
8. Personalized Name Ash Tray
Customization adds sentimental value. You can engrave or emboss names, initials, or short quotes onto your ash tray.
Use stamps or carve the text before drying. Paint it in your desired colors and highlight the text with contrasting shades.
This makes a great gift idea for friends or loved ones.

9. Retro Pop Art Ash Tray
Inspired by pop art, this ash tray uses bold colors and fun patterns. Think bright reds, yellows, blues, and comic-style designs.
Add dots, stripes, or graphic shapes. You can even include quirky text or symbols.
This design is playful and perfect for creative personalities.
10. Luxury Gold Accent Ash Tray
For a high-end look, create a luxury ash tray with gold accents. Start with a neutral or dark base color.
Add gold leaf or metallic paint along the edges or in abstract patterns. Keep the design minimal to let the gold stand out.
Finish with a glossy sealant for a polished, elegant look.
Conclusion
Clay ash trays are a perfect blend of creativity and functionality. With just a few materials and some imagination, you can create pieces that are not only useful but also visually stunning. From minimalist designs to bold artistic expressions, the possibilities are endless.
These 10 ideas provide a wide range of styles to suit different tastes and skill levels. Whether you prefer subtle elegance or vibrant creativity, there’s something here for everyone. The best part about DIY clay projects is that each piece becomes uniquely yours—no two designs will ever be exactly the same.
Beyond personal use, these ash trays can also be turned into a small business idea. Handmade, aesthetic items are highly popular on platforms like Pinterest and Etsy, making them a great opportunity for creative entrepreneurs.
